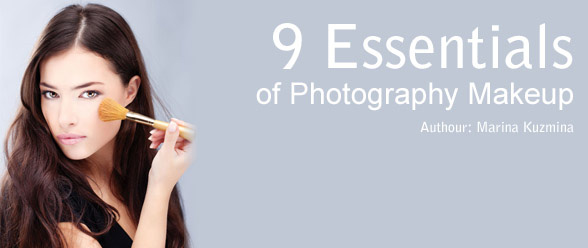
Our professional makeup artist, Marina Kuzmina, shares 9 tips to make your next photo session the best ever.

Makeup has existed for thousands of years. Wearing makeup makes women feel gorgeous, powerful, and assured. Today we are much more conscious about what we put on our skin, but as ingredients have changed and trends evolved throughout history, one thing has stayed consistent – beautiful makeup starts with a fresh, clean, healthy, moisturized skin.
There a lot of different types of makeup (makeup for photo and video shoots, evening makeup, age appropriate makeup, wedding makeup, and so on). Each type of makeup has different tips and tricks.
Doing makeup for photographs is a little different than every day makeup. Some things look great in person but don’t translate well in pictures.
Here are a few makeup tips to help you look your best when you are photographed:
- Apply your makeup in natural light – when you apply your makeup, sit by a window or in a room with a lot of natural light. This will give you the best idea of what your makeup really looks like, and how it will look in the pictures.
- Mind your neck. If you stop your foundation at your jawline, your face/neck color difference could be noticeable in photos (even if the contrast isn’t noticeable in your mirror).
- Fill in your brows – even if you don’t fill in your brows on a daily basis, fill them in for your pictures. Your eyes and face will look so much more complete if your brows are looking polished. This especially goes for blondes as blonde eyebrows will disappear in photographs.
- Get some power powder. If you always have major T-zone shine and regular powder doesn’t cut it, try a blotting powder.
- Contouring is also very important for professional photography makeup. Contours are used to shape the face and to play up or down facial features. Applying it diagonally under your cheekbones or parallel to your jaw line will really make your cheekbones pop. On the sides of your nose from the bridge straight down will make your nose appear longer and thinner. Blending here is key. On your jaw line and under your chin will make your round face look more elongated.
- Mattes are flat colors. They don’t have any sparkle or shimmer. When you’re going to be photographed you want to avoid anything that is going to reflect light on your face.
- Play up your eyes! Again, avoid shimmer or glitter. I suggest using matte or satin neutral shades to bring out your beautiful eyes. Trendy or dark colors can cause your images to look dated and your eyes to look small or garish.
- Using a lip pencil for fill in the lips. Apply a blush colored gloss lightly over the lip concentrating the application in the center and blending out toward the corners of the mouth.
- When you are having photos taken that it is not the time for experimenting with new makeup shades or trends. Also, don’t forget to pluck, tweeze, wax, or groom the areas of your face the day before so your skin doesn’t look red or swollen the day of the shoot.
And always remember that a smile will brighten your face and will make you shine!
Author:
Marina Kuzmina
 Marina Kuzmina is an acclaimed professional makeup artist with over 6 years experience abroad and in the United States. Her clients include television, theatre, fashion and cover models. She also works on location for bridal and photo session projects.
Visit her Facebook page to learn more about her skills and availability.


